Which FPV controller to choose for training and flights?
Internal and external modules for equipment: current protocols, key nuances in choosing FPV equipment for drones and training, important aspects of stick placement.
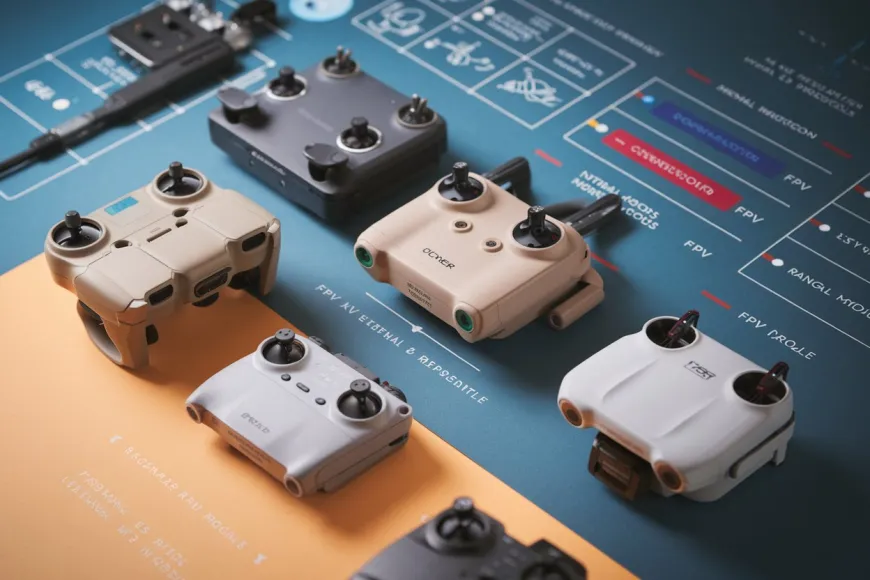
Hello, dear readers. In this article, we will try to understand controllers (transmitters).
We will look at the types of connection for control, how controllers differ from each other, and which characteristics you should pay attention to. At the end, we will summarize information about controllers.
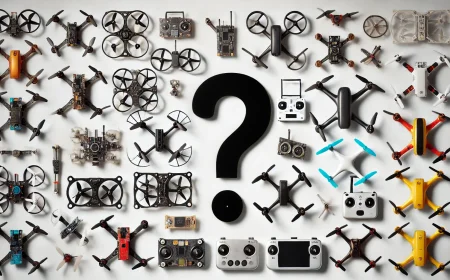
The article lists only the most popular controllers, as the full range available for purchase would make the article too long.
The Importance of Choosing a Controller
Purchasing a controller is a very important step, as your impressions, learning speed, and convenience will depend on it.
A drone is controlled only with a controller. Goggles help you see video and telemetry, which is also important.
We interact with the controller tactilely, constantly moving sticks and switching toggles, so the comfort and practicality of the controller are crucial.
If the controller is uncomfortable, when controlling an FPV drone, you may feel that the drone does not respond well, control is difficult, and your hands get tired quickly.
With comfortable controller ergonomics, you will enjoy flights, and learning will be easier and possibly even faster.
Data Transmission Protocols
Each controller has an internal module, and most support external modules, and accordingly, the module can work with a specific data transmission protocol.
When buying a controller, it's important to pay attention to the protocol type, as the FPV drone itself must use the same control data transmission protocol.
The data transmission protocol plays an important role in FPV, as it transmits all control commands from the controller to the FPV drone receiver, and then to the drone itself.
If you want to go up – you raised the throttle stick up, and the module on the controller transmitted data to the drone receiver, and the drone went up.
Data transmission protocols in some cases can also be used to receive data from the drone, such as:
- Battery level
- If GPS is available – location coordinates
- Altitude and much more
Internal Modules
The most common protocols on internal modules:
- ELRS
- TBS Tracer
- Crossfire
- 4in1
- CC2500
- Frsky
The main frequency for these protocols on internal modules is 2.4 GHz, as internal modules are primarily a ready-made solution to purchase a drone and controller set and start flying.
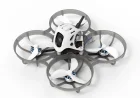
Also recommended to read the article: FPV Drone for Beginners: How to Choose Your First TinyWhoop Drone
Usually, first flights are on small drones, which also mostly operate at 2.4 GHz. The only exception is Crossfire, which operates at 915 MHz (main frequency) and 868 MHz (for European countries).
The most common these days are ELRS, TBS Tracer, TBS Crossfire. The rest of the protocols are still used but have little popularity and are gradually forgotten compared to the protocols that made it into the top three of the list.
It is believed that 2.4 GHz is suitable for short distances with more small obstacles, as this frequency has a higher data exchange rate. That is, the loss of control packets can be compensated by the data transmission speed and, accordingly, a larger number of control packet transmissions.
External Modules
The most common protocols on external modules:
- ELRS
- TBS Crossfire
These protocols use lower frequencies (915 MHz and 868 MHz). Such frequencies can work at greater distances, such as 20-30 kilometers, unlike 2.4 GHz (3-10 kilometers).
They have a lower throughput speed but a greater ability to overcome large obstacles, so they are used for long-distance flights.
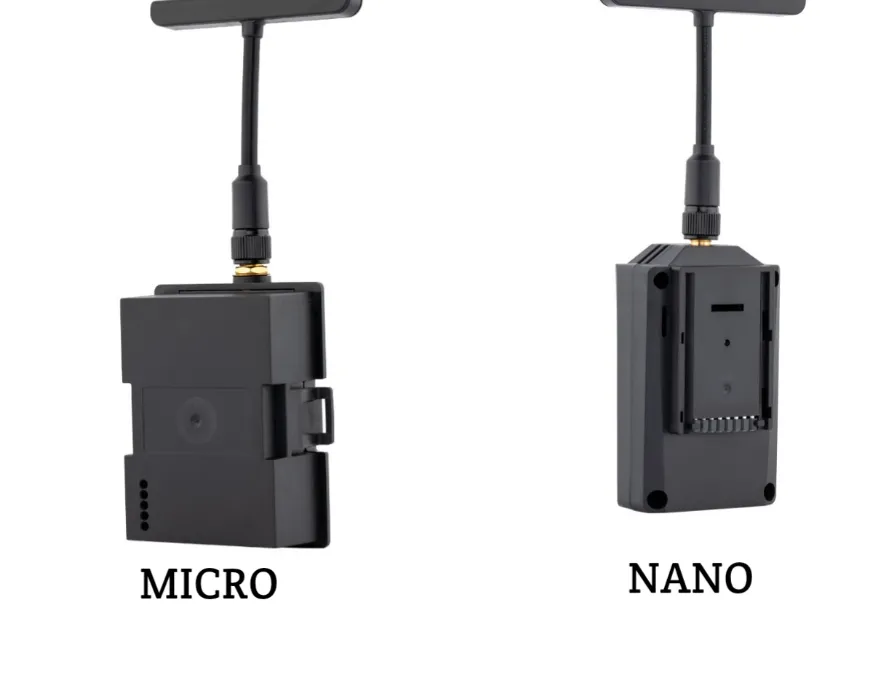
If flight range is important to you, then you should pay attention to the types of connectors on external control modules. In general, there are only two types: JR Micro and JR Nano.
There is practically no difference between the modules, the functionality is almost the same, and it mostly depends on the price. JR Micro is the most common, so there will be no problems with purchase, and the majority of controllers are sold with a Micro connector.
The advantage of JR Nano is slightly smaller dimensions, but there are few controllers with such a connector.
Controller Form Factor
First, let's consider what you need to pay attention to: form factor, sticks, and the ergonomics of toggle placement.
Form Factor and Sticks
In general, the more functionality, the more toggles on the controller. But on an FPV drone, you can use from 1 to 5 or more toggles, as well as on an airplane – it all depends on the components that make up the FPV drone and airplane.
The idea that for an airplane you need to buy a controller with the maximum number of toggles is an outdated stereotype. There are exceptions – if you have a professional type of occupation related to piloting airplanes, but this can also apply to FPV drones, it all depends on the specific activities of the pilot.
If you plan to use the controller in the future, then the priority will be an FPV controller that uses modern gimbals and Hall sensors.
And a controller that uses potentiometers on the sticks should not be considered, as this is already outdated technology and it has less lifespan compared to Hall sensors.
The form factor of FPV controllers has two main types:
- Classic, rectangular
- Gamepad style
A gamepad-style controller may be suitable for beginners and for field flights when mobility and compactness are important.
The advantages of such a controller are ease of use, but not for everyone. It should be remembered that full-size sticks will be absent, meaning the control stick travel will be shorter than a full-size stick.
The classic format is more suitable for professional flights or future pilots who want more functionality. After all, the classic format is more bulky (full-size), so they have more toggles, sticks are usually full-size.
Also, don't underestimate the presence of a screen – the larger the screen, the more information it can provide to the pilot.
Among the classic format, it's possible to choose more compact options, but don't forget that such controllers are usually transported in cases and lose in terms of dimensions compared to gamepad-style controllers.
Be sure to pay attention to the strap mount, because when you are focused only on control, the enjoyment of flights will be greater. And especially when you are taking your first steps in learning, comfort plays an important role.
Types of Stick Layouts (Mode)
Also, don't forget about the layout (Mode) of control sticks. Let's look at the main types (modes) of stick layouts on FPV controllers:
Mode 1 (MK1)
- Right stick: Throttle (up/down) and Roll (left/right)
- Left stick: Pitch (forward/backward) and Yaw (left/right)
Mode 2 (MK2)
- Left stick: Throttle (up/down) and Yaw (left/right)
- Right stick: Pitch (forward/backward) and Roll (left/right)
Mode 3
- Right stick: Pitch (forward/backward) and Yaw (left/right)
- Left stick: Throttle (up/down) and Roll (left/right)
Mode 4
- Left stick: Pitch (forward/backward) and Roll (left/right)
- Right stick: Throttle (up/down) and Yaw (left/right)
The most popular and recommended for beginners is Mode 2 (MK2).
Here's why:
1. It's the most common standard in the FPV world
2. Most tutorial videos and instructions are oriented towards Mode 2
3. It's easier to find an instructor who teaches flying on Mode 2
4. In case of problems with the controller, other pilots can easily help, as most use this mode
Therefore, for a beginner, it's recommended to start with Mode 2 right away – this will make the learning process simpler, and help from the community more accessible.
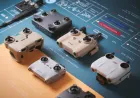
Review of Controllers
Let's look at several good options, starting from a controller for training and ending with a more professional one that will later be used for direct drone control.
LiteRadio 3 from BETAFPV
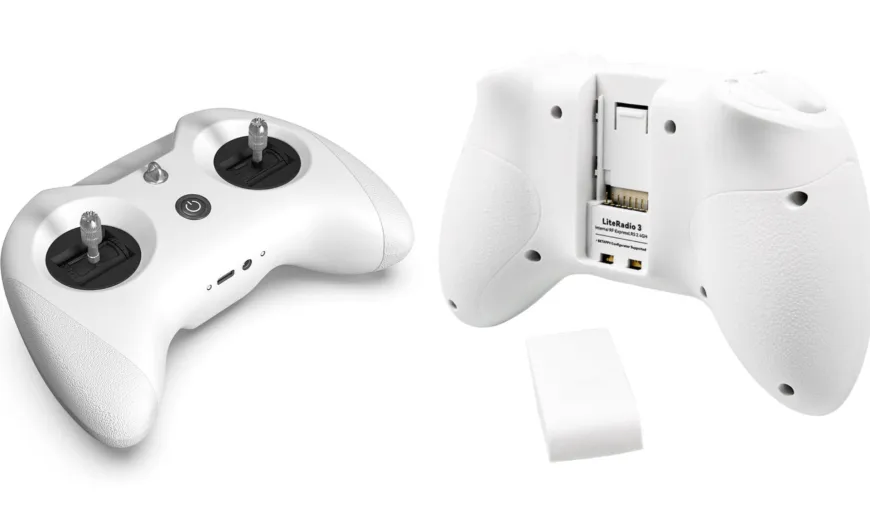
Let's start with the basic controller LiteRadio 3 from BETAFPV. This controller is suitable for those who are taking their first steps in FPV, as it has a small price tag (on the official site, the cost is $32.99), sufficient functionality, and compact dimensions.
Main characteristics:
- 8 channels
- Frequency 2.4 GHz
- Support for Frsky, ELRS protocols
- Internal module power: ELRS 25mW/50mW/100mW; Frsky-100mW
- Support for USB 3.0 Type-C-charging/firmware update
- Internal battery 2000 mAh 1s
- Support for external modules in NANO format, the manufacturer recommends installing modules from BETAFPV
This controller is fully suitable for starting. First for learning on a simulator, then you can move on to flying on a TinyWhoop.
But for slightly larger drones, there may not be enough power on the internal module. If there is a strong desire, then there is the possibility to purchase an external module, but for larger drones, it's worth purchasing a more professional controller.
Radiomaster Pocket
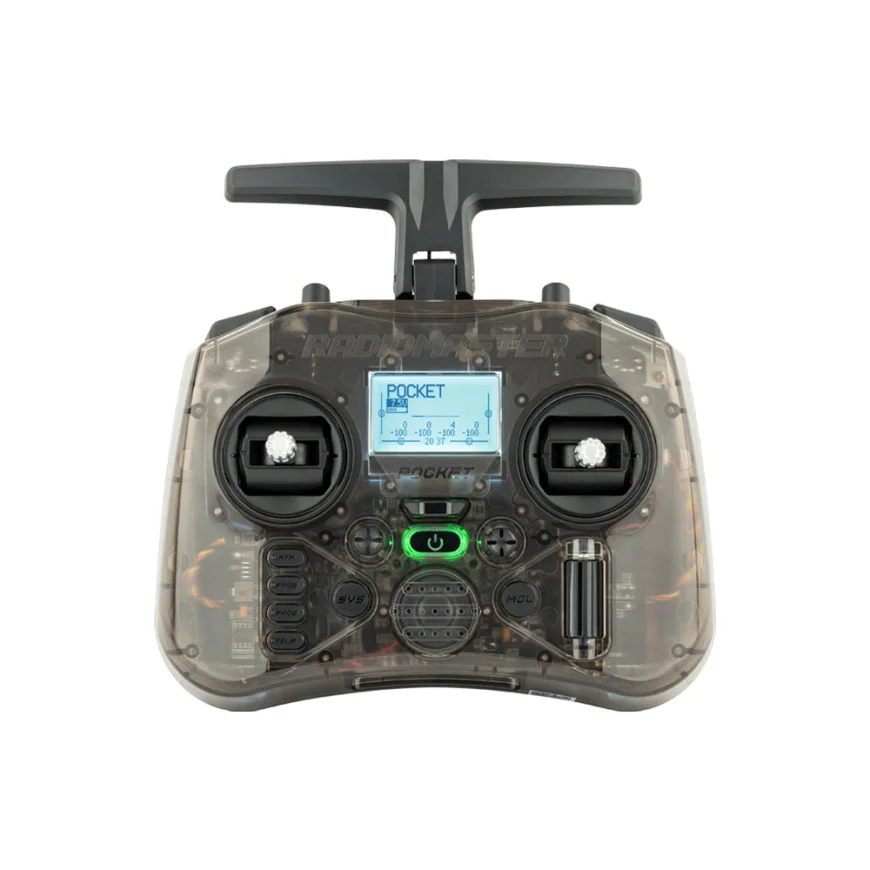
This controller is entry-level, but at the same time quite professional and will be perfect both for learning on a simulator and for further piloting FPV drones.
Main characteristics:
- Channels: up to 16 (depending on the receiver)
- Internal module frequency: 2.400 GHz-2.480 GHz
- Internal module: CC2500 / ELRS 2.4 GHz
- Internal module power: 10mW/25mW/50mW/100mW
- Sticks with Hall sensors
- Support for external module in NANO format
- Display: monochrome LCD 128*64
- USB Type-C, PC connection, built-in USB-C QC3 charging
- Voice command playback, vibration
Radiomaster Pocket is a great and inexpensive option for beginners. It's compact and perfect for travel. The gimbals (sticks) can be unscrewed and placed in special moldings located on the back of the case, which is very convenient for transportation. The cost of the controller on the official site is $65, and this is a great price-quality ratio, which corresponds to the functionality of this controller.
Radiomaster TX 12 II
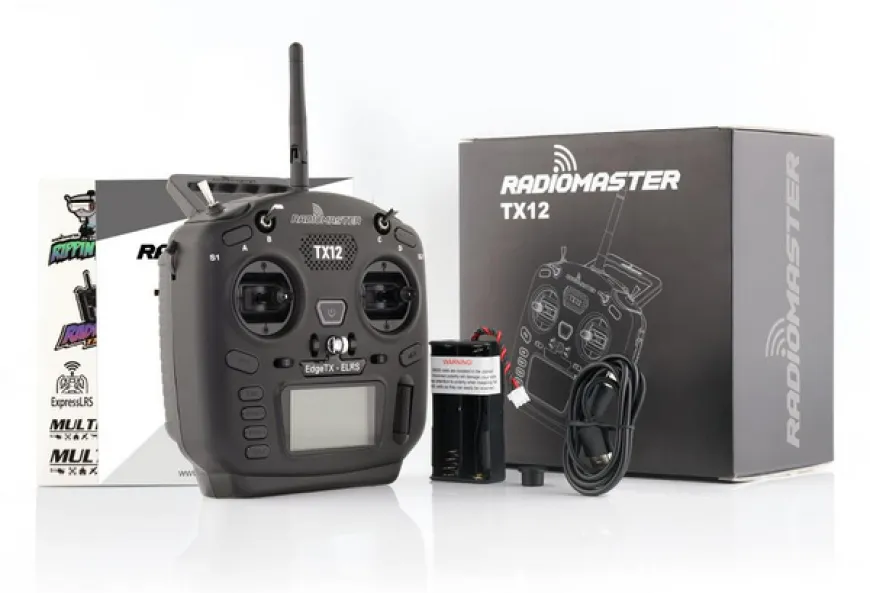
This controller already has more sticks and, accordingly, more capabilities.
Main characteristics:
- Channels: up to 16 (depending on the receiver)
- Internal module frequency: 2.400 GHz-2.480 GHz
- Internal module ExpressLRS; CC2500
- Internal module power: 10mW/25mW/50mW/100mW/250mW
- Sticks with Hall sensors
- Support for external NANO module
- Display: 2.1-inch monochrome LCD screen
- USB Type-C, PC connection, charging
- Possibility to install a larger capacity battery
- Voice command playback, vibration
So, Radiomaster TX 12 II can fully satisfy the basic needs of an FPV pilot, and if needed, when there is more knowledge in FPV, you can consider more expensive controllers. TX 12 II has a great price-quality ratio, the price on the official site is $99.99.
Radiomaster Boxer

Radiomaster Boxer is a great controller that has the golden middle: quality, price, size. The controller has larger sticks than TX 12 II, they are more comfortable to control, and microcontrol of the drone is of higher quality due to the full-size sticks with Hall sensors. It also has a sufficient number of toggles and buttons.
The feature of Boxer is that the sticks are adjusted without disassembling the controller itself. And the internal module on the ELRS protocol has a power of 1 Watt. As you can see in the image, Radiomaster didn't skimp on the package in the form of a case and stick overlays.
Main characteristics:
- Channels: up to 16 (depending on the receiver)
- Communication protocols: ExpressLRS, 4-in-1, CC2500
- Internal module frequency: 2.400 GHz-2.480 GHz
- Sticks with Hall sensors
- USB Type-C, PC connection, quick charging QC3.0 2.0 A MAX
- Support for external NANO module
- Display: 2.1-inch monochrome LCD screen
- Possibility to install a larger capacity battery
- Voice command playback, vibration
As we can see, Boxer turned out better than TX12 II, and it will be a great option for learning and using in the future. Even the internal module will allow you to enjoy flights without limiting you to short distances.
Summary
So, the choice of controller should be approached responsibly, so before buying, decide what your needs will be: whether a cheaper option will be sufficient for you, or you need to buy something more expensive.
A limited number of controllers were mentioned in this article. I would also recommend paying attention to:
- Radiomaster TX 16
- TBS Tango 2
- TBS Tango 2 PRO
- RadioMaster Zorro
- Jumper Т12 Max
- Jumper Т15
- Jumper T-Pro V2
As we can see, the range is not small. Therefore, when choosing, spend an hour or two searching for information about the controller on the internet. Reviews on specific controllers are quite informative, not general materials about form factors, types, etc.
Please share in the comments whether this information was useful for you and what questions you still have. In future articles, we will try to provide a detailed answer.
Article Update History
What's Your Reaction?
 Like
0
Like
0
 Dislike
0
Dislike
0
 Love
0
Love
0
 Funny
0
Funny
0
 Wow
0
Wow
0
 Sad
0
Sad
0
 Angry
0
Angry
0
FPV — це не просто хобі, а й частина моєї роботи. Я ділюся тільки тим, що дійсно корисне та цікаве. Ласкаво прошу в світ FPV!


Comments (0)